Want to join in? Respond to our weekly writing prompts, open to everyone.
An Elegy to a More Deserving Word
 An Essayist's Notebook
I learned the word decimate in a school history lesson. I remember it well. Later, in an inter-school debating competition, I remember the pleasure of using it myself.
I was arguing that the proposal advanced by the opposing team was not merely damaging to society. It was asking people to participate in their own ruin. Rather like removing stones from the building's foundations in order to strengthen its walls.
Decimate seemed the perfect word.
The practice from which it emerged belonged to the Roman legions. A military unit judged guilty of an offence could be ordered to decimate itself. The punishment was horrifying precisely because it was collective and self-inflicted. One man in every ten was selected and killed by his comrades. The unit itself carried out the sentence.
That is what gave the word its extraordinary power. It did not simply describe destruction. It described a group compelled to become an instrument of its own punishment. Self-harm elevated to public policy.
Few English speakers hear that meaning today.
Ask someone what decimate means and they will probably say “destroy”, “devastate”, or “wipe out”. Dictionaries now largely accept those broader definitions because common usage has long since moved on. Language, after all, follows speakers rather than historians.
Yet something has been lost.
The older meaning carried a flavour that the modern one lacks. It contained ideas of complicity, discipline, participation and sacrifice. A forest may be devastated by fire. A city may be destroyed by war. But a legion decimated itself.
That distinction mattered.
So what should writers do with words like this? If you are writing for specialists, the historical meaning may still survive. But what if your audience hears only the modern sense? Do you continue to defend the older usage in the hope of preserving a fragment of linguistic history? Or do you accept that language changes, surrender gracefully, and move on?
I have chosen the latter.
This is probably the last time I will use the word decimate. Not because I have stopped admiring it, but because the meaning I admire is no longer the meaning most people hear.
So farewell, old friend.
May some future generation rediscover you, and understand why you once seemed such a remarkable word.
 David Marshall
Sna Sceirí
David Marshall
Sna Sceirí
Comment organiser un débarras efficace
from infos

Comment organiser un débarras efficace et sans stress
Organiser un débarras, ça peut sembler une montagne à gravir, on est d'accord. La bonne nouvelle, c'est que ce n'est pas forcément synonyme de chaos et de journée perdue. Avec une bonne préparation et quelques astuces, on peut rendre ça beaucoup plus gérable, voire même étonnamment satisfaisant. L'idée, c'est de transformer une tâche souvent redoutée en un processus clair et structuré.
Se Préparer : Le Secret d'un Débarras Réussi
Avant même de penser à toucher la première boîte, l'étape la plus cruciale est la préparation. Elle englobe autant votre état d'esprit que votre condition physique. Sans cette mise en condition, le risque de se retrouver submergé ou de s'épuiser rapidement est bien réel. C'est un peu comme avant une longue randonnée : on ne part pas sans chaussures adaptées et une carte.
Préparer Son Mental : Accepter le Défi
Organiser un débarras, c'est souvent faire face à des choses qu'on a accumulées pendant des années, parfois avec une charge émotionnelle. Il est donc essentiel d'aborder cette tâche avec la bonne attitude.
Lâcher prise : La Clé de la Désencombrement
Le plus gros obstacle, c'est souvent notre attachement aux objets. Il faut accepter que certaines choses ont rempli leur rôle et qu'il est temps de leur dire au revoir. Pensez au soulagement que vous ressentirez plutôt qu'à la perte. Visualisez l'espace que vous allez libérer.
Fixer des Objectifs Réalistes
Ne visez pas de finir tout en un week-end si vous avez des années d'accumulation. Découpez la tâche en plus petites étapes. Par exemple, un jour pour le grenier, un autre pour le garage, etc. Célébrez chaque petite victoire, ça motive !
Anticiper les Obstacles Émotionnels
Vous pourriez retrouver des objets qui vous rappellent des souvenirs. C'est normal. Prévoyez des moments pour cela, mais ne vous laissez pas submerger. Gardez à l'esprit l'objectif final : un espace plus fonctionnel et agréable.
Se Préparer Physiquement : Être Prêt pour l'Action
Un débarras, c'est aussi une activité physique. Sans être un athlète, être en bonne forme peut faire une grande différence dans votre endurance et votre efficacité.
L'Équipement Nécessaire
Avant de commencer, assurez-vous d'avoir le bon matériel. Des gants de travail pour protéger vos mains, des chaussures fermées pour la sécurité, et des vêtements confortables dans lesquels vous pouvez bouger librement. Pensez aussi à de l'eau pour rester hydraté.
L'Importance du Repos
La veille de votre session de débarras, dormez bien. Une bonne nuit de sommeil vous donnera l'énergie nécessaire pour affronter la tâche. N'oubliez pas de faire des pauses régulières pendant l'activité pour éviter la fatigue excessive.
Trier et Organiser Avant de Plonger
L'étape du tri est peut-être la plus fondamentale. Essayer de débarrasser sans avoir trié, c'est comme vouloir vider une maison avec une seule petite poubelle : inefficace et frustrant. L'organisation avant l'action rendra la suite beaucoup plus simple.
La Méthode du “Quatre Cases” (ou Plus)
Une technique simple et efficace est de préparer plusieurs zones ou récipients dédiés à chaque catégorie de sortie.
La Pile “À Garder”
Ce sont les objets que vous utilisez régulièrement ou que vous tenez vraiment à conserver pour leur utilité ou leur valeur sentimentale. Soyez honnête avec vous-même sur leur utilité réelle.
La Pile “À Donner”
Les objets en bon état mais dont vous n'avez plus besoin peuvent trouver une seconde vie. Pensez aux associations, aux amis, aux brocantes.
La Pile “À Vendre”
Si certains objets ont une valeur marchande, prévoyez une catégorie pour les mettre de côté. Cela demande un peu plus de temps, mais peut être gratifiant financièrement.
La Pile “À Jeter”
Ceci inclut les objets cassés, inutilisables, périmés ou en trop mauvais état pour être donnés ou vendus. Il faut être rigoureux ici.
La Pile “À Relocaliser”
Parfois, on retrouve des choses qui appartiennent à une autre pièce de la maison. Créez une pile pour les remettre à leur place après le débarras principal.
Un Débarras Par Zone pour Plus d'Efficacité
Essayer de trier toute une maison d'un coup peut être écrasant. Concentrez-vous sur une zone à la fois.
Commencer Par les Endroits les Moins Émotionnels
Si possible, commencez par des zones comme le garage, la cave ou un débarras qui contiennent moins d'objets chargés émotionnellement. Cela vous permettra de vous entraîner à trier et à prendre des décisions sans être trop émotionnel.
Aborder les Zones Sensibles en Dernier
Les dressings, les bureaux ou les bibliothèques peuvent contenir des objets plus personnels. Une fois que vous êtes rôdé au processus de tri, vous serez mieux préparé à les aborder.
Élaborer Votre Stratégie de Débarras
Une fois que vous êtes prêt mentalement et physiquement, et que vous avez une idée claire de ce que vous voulez faire de chaque objet, il est temps de planifier la logistique du débarras lui-même. Une bonne stratégie évite le gaspillage de temps et d'énergie.
La Logistique du Transport : Comment Faire Sortir les Choses
L'une des choses les plus complexes dans un débarras, c'est de gérer le volume des objets à évacuer.
Déterminer le Volume à Évacuer
Faites un tour rapide de ce qui doit sortir. Est-ce quelques sacs ? Une remorque ? Plusieurs gros meubles ? Cette estimation est cruciale pour choisir la bonne méthode d'évacuation.
Planifier les Trajets de Sortie
Pensez à l'itinéraire que vont prendre les objets pour sortir de chez vous. Est-ce qu'ils vont passer par la porte d'entrée ? Par une porte de service ? Y a-t-il des escaliers étroits ? Identifiez les éventuels points de blocage.
Le Calendrier du Débarras : Quand et Comment
Définir un calendrier réaliste est essentiel pour ne pas se décourager.
Découper le Projet en Étapes Gérables
Si le débarras est important, ne prévoyez pas de tout faire en un seul jour. Fixez-vous des objectifs par pièce, par pièce ou même par étagère. Par exemple, le samedi matin, je m'occupe du garage.
Prévoir des Moments de Repos et de Récompense
Même dans un projet de débarras, il faut savoir s'arrêter. Prévoir des pauses, déjeuner confortablement, ou même vous accorder une petite récompense après une étape bien avancée peut vous aider à rester motivé.
L'Aide : Un Allié Indispensable #debarras
Essayer de tout faire tout seul est souvent une recette pour le stress et le surmenage. Faire appel à de l'aide, qu'elle soit humaine ou professionnelle, peut transformer radicalement l'expérience.
L'Aide Familiale et Amicale : Une Option Souvent Sous-Estimée
Vos proches peuvent être une excellente ressource, à condition de bien organiser leur intervention.
Communiquer Clairement les Attentes
Avant de solliciter de l'aide, soyez précis sur ce que vous attendez. Indiquez la date, l'heure, la tâche à accomplir et la durée approximative. Cela permet à chacun de se préparer.
Motiver Vos Auxiliaires
Offrez de la nourriture et des boissons, prévoyez de la musique, et surtout, montrez votre gratitude. Un petit repas ou une soirée conviviale après le débarras peut transformer la corvée en un moment partagé agréable.
Déléguer des Tâches Spécifiques
Si certains amis sont particulièrement doués pour le tri, d'autres pour le transport, attribuez-leur des rôles adaptés.
Les Services Professionnels : Quand l'Efficacité Prime
Pour les débarras de grande ampleur, ou si vous manquez de temps ou d'énergie, faire appel à des professionnels est une solution très efficace.
Les Sociétés de Débarras : Une Solution Complète
Ces entreprises prennent en charge l'ensemble du processus, du tri à l'évacuation, en passant par le recyclage. C'est la solution la plus simple si le budget le permet.
Les Services de Location de Contenants
Si vous comptez gérer une partie du tri vous-même mais que vous avez beaucoup à évacuer, louer une benne ou un grand conteneur peut être une option très pratique.
La Gestion des Déchets : Un Aspect Crucial
Un débarras efficace ne s'arrête pas à vider les lieux. La manière dont on se débarrasse des objets est tout aussi importante, tant sur le plan environnemental qu'en termes de législation.
Respecter les Règles de Recyclage et de Tri Sélectif
La plupart des déchetteries et des municipalités ont des règles strictes concernant le tri des déchets. Ne pas les respecter peut entraîner des amendes et surtout, nuire à l'environnement.
Identifier les Points de Collecte Proches
Renseignez-vous sur les déchetteries les plus proches, leurs horaires d'ouverture, et les types de matériaux qu'ils acceptent. Certaines déchetteries spécialisent leur accueil : encombrants, métaux, bois, gravats, etc.
Préparer Vos Déchets pour le Tri
Si vous avez beaucoup de matériaux à trier, cela vaut la peine de les regrouper par catégorie avant de les emmener. Par exemple, tous les cartons ensemble, tous les métaux ensemble.
La Gestion des Objets Volumineux et Spécifiques
Certains objets nécessitent une attention particulière.
Les Meubles et l'Électroménager
Ces encombrants doivent souvent être déposés dans des déchetteries spécifiques ou font l'objet de collectes ponctuelles organisées par votre commune.
Les Produits Dangereux
Les peintures, solvants, produits chimiques ou batteries ne doivent jamais être jetés avec les ordures ménagères. Il existe des filières de collecte dédiées pour ces substances.
La Destruction de Documents Confidentiels
Si vous débarrassez des documents contenant des informations personnelles ou sensibles, assurez-vous de les détruire correctement (déchiquetage, incinération sécurisée) avant de les jeter.
Nettoyer et Ranger Après le Débarras : La Touche Finale
Une fois que les objets indésirables ont quitté les lieux, l'espace peut encore sembler brut. La phase de nettoyage et de rangement finalise le processus et rend l'espace vraiment agréable.
Redonner Leur Propreté aux Espaces Libérés
Le débarras a souvent mis à jour des saletés accumulées.
Le Nettoyage en Profondeur
Passez l'aspirateur, lavez les sols, dépoussiérez les étagères et les murs. Si nécessaire, faites un nettoyage plus poussé des tâches ou des moisissures.
L'Aération des Pièces
Ouvrez les fenêtres pour laisser l'air frais circuler. Cela permet d'éliminer les odeurs stagnantes et de créer une sensation de renouveau.
Réorganiser et Optimiser l'Espace Restant
Maintenant que l'espace est vide et propre, il est temps de le réorganiser.
Repenser l'Agencement
Voyez comment vous pouvez utiliser au mieux l'espace libéré. Peut-être qu'un meuble peut être déplacé, ou qu'une nouvelle étagère serait utile.
Mettre en Place un Système de Rangement Efficace
Si vous avez décidé de garder certains objets, assurez-vous qu'ils sont rangés de manière logique et accessible. Utilisez des boîtes, des paniers, des étiquettes pour maintenir l'ordre.
Évaluer et Ajuster
Après quelques semaines, évaluez si votre nouvelle organisation fonctionne. N'hésitez pas à faire de petits ajustements si quelque chose ne convient pas. Le but est de créer un espace qui vous facilite la vie au quotidien.
The Essay Behind the Essays
I have just published a piece called “To Dig Where I Stand” on Marshall on Policy. It is not an essay on housing, infrastructure, energy, governance or any other policy topic, in away it's about all of them. It attempts to answer a question that I had not realised readers were asking:
“What exactly are these essays trying to do?”
The answer eventually led me to identify three principles that seem to have emerged from the writing itself:
• Understanding comes before prescription. • Sequencing is substance. • Relationships create outcomes.
They seem to have been present, sometimes only as undercurrents, in my essays about music, infrastructure, landscape and governance, long before I recognised them explicitly. Some assumptions run deep. Discovering them requires a degree of intellectual honesty, and perhaps a little perseverance.
That raises an intriguing possibility. Perhaps an essayist does not invent a method so much as discover one, much as a river discovers its course.
I Almost Started a Channel in the Most Crowded Niche on the Internet
from AI Tools Test | Reviews, Comparisons & Guides
Update from the “should I start a YouTube channel” saga, for the three of you following along. Short version: I was about to make a common mistake, and a boring research afternoon talked me out of it.
Key takeaways
- “Topics I like that seem to do well” is a list of the most contested ground on the platform.
- Look at demand and competition together, not at what already looks successful.
- A beginner's only real edge is a niche with real search demand and weak, dated coverage.
- Low competition can also mean low demand. An empty niche is sometimes a warning, not an opening.
The mistake I almost made
The mistake was going to be personal finance. I like the topic, I know a fair amount, and every video I admired seemed to be in that world. So obviously I would make one too. This is how most channels are born and also how most channels die, and I could not see the problem from inside my own enthusiasm.
Why “topics I like doing well” is a trap
“Topics I like and see doing well” is a list of the most contested ground on the platform. The videos I admired were doing well despite brutal competition, made by people who had been at it for years with budgets I do not have. Walking into that as a beginner is not a plan. It is volunteering to be invisible.
Look at demand and competition together
What reoriented me was spending an afternoon looking at demand and competition side by side instead of chasing what looked successful. I used a tool to find a low-competition YouTube niche, which scans for where search interest is real but the existing coverage is thin, rather than where the big, obvious money already is. The difference between those two maps is the whole game, and I had been reading the wrong one.
The winnable niche next door
Broad personal finance was a wall: enormous demand, enormous competition, no room for a beginner. But a few sub-niches underneath it looked completely different. One specific corner, a narrow financial situation that a lot of people search and almost nobody makes good videos about, had steady demand and weak, dated coverage. That is not a smaller version of the crowded niche. It is a different, winnable niche that happens to live nearby.
A caveat: empty can mean no demand
One caution I want to keep visible, mostly for myself. Low competition can also mean low demand, and a niche being empty is sometimes a warning rather than an opening. The tool shows you where the gap is. It does not promise the gap is worth filling. That judgment, and whether I can actually make something good in that corner, is still on me.
The decision
I have not filmed anything yet, so this is a decision story, not a success story. The decision is that my first ten videos go to the narrow, underserved corner, not the broad, glamorous topic, because a beginner's only real advantage is picking a fight nobody bigger is bothering to have. If you are about to start a channel, spend one afternoon on demand and competition before you commit a year to the wrong niche.
Blaugust 2026
from  Noisy Deadlines
Andreas from 82Mhz just published he is joining #Blaugust 2026. I remember I joined in 2024 and it was a fun way to keep blogging. I had an introduction post back then, and although most of it is still current, I will do a quick update here:
- I still work in construction as an estimator, and I am now considered a senior estimator in my team.
- I still love reading, and it is my main hobby, as attested by the posts on this blog. I am very much a sci-fi and fantasy reader, but I’ve been distancing myself from anything too dark or grim. I balance my reading with some fluffly romances sometimes. I’ve been better at dumping a book when it’s not working for me.
- Still an introvert and cherishing quiet time and actitivites that bring me calm: running, walking, reading, journaling, meditating and listening to music.
- I’ve started Bullet Journaling recently and it has been a big change for me. I plan on writing more about this experience. I am becoming more and more inclined to use paper and take notes by hand (I’m actually drafting this post by hand right now).
- I haven’t been playing a lot of video games lately, most of the time I will just prefer to sit down with a book. But I want to get back to some of the games I’ve started.
So for the 2026 Blaugust I want to go for the Silver Award with 15 posts in August.
I’ve been wishing to write and publish more frequently on this blog, so Blaugust is a great accountability tool to me keep me going.
Some Blaugust references I came across that inspired me to join:
- Let's do Blaugust by 82MHz
- Welcome to Blaugust by Tangent Space
- Blaugust 2026 is Coming! by Nerd Girl Thoughts

#Blaugust
from Faucet Repair
31 July 2026
Visited Tobias's studio ahead of our upcoming conversation for the podcast and got to spend some time with the body of work he has been developing (he showed me nine paintings made over what I believe he said was the past eight or nine months). It's excellent, inspiring work, so I'm getting some notes down here.
Firstly, gridding; these paintings establish a conversation with gridding that isn't so much a system as it is an ongoing set of suggestions around the reactions a system might imply. A—let's say roughly nine—quadrant grid is repeatedly alluded to and yet never exists as a graspable solid framework. Even in one work where the quadrants are quite forward, hard-edged, and visible, their form-defining borderlines tilt, skew, echo, and overlap such that the effect is something like pieces of paper strewn around a flat surface or windows containing ranges of seasonal or emotional states. In fact, (and I know I'm prone to bringing him up), I sense something of Jasper Johns's Seasons (1987) etching and aquatint works (and the totality of his work more broadly speaking) in these paintings in that form seems to be mostly utilized and dilated to open the door for focus to constantly shift and for something else to appear on the surface. And that something else might hint at locatable subjects, (in working titles and early associative thoughts, Tobias mentioned words like “reservoir” and “diesel,” and I do sense a kind of lingering omnipotent noxiousness), but ultimately passes them by as it moves around in search of new formal relationships to unpack. It's not purely formal work, but it understands its way in.
Tobias mentioned Manet with regard to his ability to deploy structures around figures that create a certain leeway for perhaps more experimental whims or marks to feel justified within those structures, and I get what he means while looking at his work (although he also spoke of confronting limitations, and I think Manet's were ultimately the cause of some of his weirder and more spatially confounding and therefore more timeless paintings). But in Tobias's case, as I've already alluded to, I think his freedom unlocks from manipulating the structure itself. And therein lies a sort of twisting of subject into content and back again that makes the work generative and fresh. In paintings beyond the aforementioned most delineated one, the grid collapses, rotates, curls, disintegrates, compresses, duplicates, and glitches. In these ways, one of the main elements being constantly negated is rigidity. Which is further enforced by the mostly pale, subdued, often muddy, deceptively gentle palette. I say deceptively because the work doesn't read as gentle to me, but it does read as unified by a considered sensitivity.
More thoughts to come, but that's a start.
from Faucet Repair
29 July 2026
“The General” by Bernadette Mayer, from The Old Style Is Finding out Something about a Whole New Set of Possibilities (1966-70)
Later in secret Later in secret the general Bends to remove something To lean against a fresco. The rules which run Around the walls The walls of court Determine a course, Declare if he had not:
Sulphur and pitch, sulphur and lead, sulphur and gum mastic, sulphur and varnish, mixed with the husks of pine-kernels, sawdust, isinglass, shells of snails, husks of beans, and seed of myrtle.
From here any direction is shown. The woods must be razed — resumption of growth The market growing, profusion, the question To hold — to hold Parts or acts in the act of disintegrating wholly. A sign over the hull — the evening In a complex of other evenings Behind the intervening ledge, the general.
He Loves Me...Uh Oh!
from AnOublietteofThought
I like to put parameters into Google and have it present me with a question that I might not come up with myself. It allows me to think about things that I might not normally. Today's question is as follows:
“Imagine a new global law mandates that every citizen must publicly wear a digital badge displaying the exact percentage of how much they actually like the person they are currently talking to.
How would your relationships change? Would you avoid people? Would it destroy polite habits in interactions?”
I am not sure that I'm going to answer these questions exactly, because I think the idea behind them is more intriguing. Psychologically, how would that change us? Could it be a positive change? Could it be a negative change? I think it would be an intriguing change.
We would have to become comfortable in our skin. I suppose it could go the exact opposite way considering how daft we can be, but if a generation grew up from the start having that and not being encouraged to ensure that they succeed in popularity, it could possibly be a pretty positive thing. I mean, unless someone is extremely good at acting, we have an instinct of whether a person likes us or not. We ignore it. This would force people to acknowledge it. But it would also allow people to no longer mask. Perhaps it would allow for greater professionalism. Perhaps it would help us become less insecure. Then again it could force more insecurity upon people with this abundant need to be liked that exists today.
Maybe I should answer the questions as opposed to just letting my mind wander off in a million directions like I tend to do. How would it change my relationships? I think it would make my relationships more honest in some cases, but in others I don't think it would change them at all. If anything it might give the person reassurance that, “Hey I actually enjoy your company.” In the ones where the score might be lower than the other person expects I think it would open up that opportunity to talk about why. Perhaps it would make communication better for most people since we tend to avoid those topics. I think most people are afraid of the answers they might receive.
I rather like the idea, since it would grant opportunity for self-growth. I don't like the idea because I think it would further numb our own awareness. Which perhaps brings about another question as we become more technically inclined. What trade-offs are worth trading off? Is easy access to such knowledge worth the loss of an instinctive comprehension? And would it feed our negative or our positive impulses?
For me, any question that is like this is not about the immediate or secondary or third possibilities. I prefer to look long range and then come backwards from the furthest point out that I can think of. We can't know what shifting any one thing is going to cause because there will be elements that come into existence that we never thought of before, and that will have pivotal changes in our course. But we can ponder beyond the immediate as far as risk versus reward goes and try to contemplate and comprehend the shifts across a wide spectrum.
I think one of the things that would probably happen is people would try to place such a thing on animals and then would get upset if their cat or dog doesn't like them in a moment. I wonder if they would take it out on the cat or dog versus figuring out why. People are so poor at figuring out why and trying to communicate and comprehend a different perspective, that I think it could really bring up some issues across a vast majority of people.
Would I avoid people? I already avoid people. 😹 I don't think it'd have an effect on the number of my interactions. Though from a curiosity standpoint, I would possibly engage with more people just to observe the like/dislike perspective. Yes. I can see how I could become amused by that for a short term if I'm being honest with myself. Reactions would likely sway how quickly I got bored. I find constant engagement with people to be exhausting as is. I think it'd be interesting to see the awareness form between perceived likability/popularity and reality in various persons. It'd also be interesting to witness how that factor might shift and affect things. There's a lot of possible parameters involved. It could be interesting to watch the birthing of awareness.
Would it destroy polite interactions and habits? I think it would evolve them. What would be interesting would be if a person were capable of masking well enough to throw off the measurement. If not, networking would become an absolute riot.
The more I think about it, the more options of what could occur flutter through my mind. It would certainly create a very different world than we live in now. Would it be for the better or worse, I do not know. How adaptable are we at that psychological level? Would it evolve our thinking and perception of others and self? Would it increase popularism or force it into extinction? Would everything lay somewhere in between? Would we have to become comfortable with being uncomfortable? It would be a very exciting experiment to run with persons willing to submit themselves to it. Especially when we consider the lie we tell ourselves of how we are being perceived quite often.
I think the question that I would be even more interested in seeing placed and hearing the response to would be if we looked into the mirror would we then get a result of how much we like or dislike ourself? And if that percentage number was accurate, would it encourage us to shift and like ourselves more? Curiouser and curiouser. I would be interested to see how much I like myself. I think I like myself somewhere around 90% or above. There are a few things that I would like to improve upon, but overall I have learned to be someone who I enjoy. I would like to see if that's true or not. Could I be lying to myself? Oh the questions that this brings up.
How about you? What do you think of such an event? And how much do you like yourself? Do you even know? Dun. Dun. Duuuuuuuuuuuuunnnnnnnn...
Written August 1, 2026. © 2026 AnOublietteofThought.
from  Tecida à mão
Eu nem acredito que estou fazendo isso em pleno ano de 2026, quando a IA está no seu momento mais supervalorizada e quando todos os olhos estão voltados para a facilidade que ela nos impõe.
Para começar, eu não sou uma anti-tecnologia – eu to muito longe disso (se é que posso voltar a ter o direito de usar travessão sem acharem que o texto é do chat). Atualmente trabalho como social media gerenciando minha própria agência de marketing digital, mas um dia, num passado tão tão distante (digamos uns 10 anos atrás?) me via formada em jornalismo escrevendo textos enormes e decorando livros ainda maiores. A pergunta é: aonde foi que eu me perdi?
Voltando ao assunto, o ano é 2026 e me vi nos últimos tempos sedenta por ler textos reais. Aqueles que são escritos por gente real, com erros reais, com pensamentos que vão e voltam. E, no meio de tanta criação de conteúdo que me vejo fazendo no Instagram para ajudar outras empresas a crescerem no digital, dentro de mim um sopro: e se a gente voltasse a fazer textão? Daqueles que ninguém mais lê. Daqueles que só lê quem realmente gosta de textão verdadeiro, feito à mão.
Pois bem. Deus tem seus jeitinhos de falar comigo. E cá estou eu, num sábado chuvoso, 7 da noite, com meu filho recém dormido no meu colo abrindo um blog para criar textos e conexões sobre assuntos que me vem à mente.
Da maternidade ao mundo digital, da vida cotidiana à fé. Vocês vão ver de tudo aqui… só não vão ver texto de IA. Porque Deus me teceu no ventre da minha mãe com um dom que não posso deixar desperdiçar em 2.200 carácteres de legenda do insta.
Bem-vindos ao meu mundo sem cortes.
Com amor,
Kyane Vives.
Different kinds of love
from An Open Letter
I’m thinking about the YouTube video that I was watching again that at one point talked about the different kinds of love according to an old study, there were things about passion, things about practicality about competition and so forth. I matched with someone today that I feel like I have pretty good synergy with communication style-wise. I wonder if this is something that I can hope for an a partner or if it’s one of those unimportant goals.
Keeping a Recurring Host Believable Across Every Episode of a Series
from AI Tools Test | Reviews, Comparisons & Guides
A creator I follow built a series around a single recurring on-screen host. The host was the identity of the whole thing, the reason viewers came back. The problem showed up once the series scaled: producing a believable, consistent host for every episode meant either filming the same person on a strict schedule forever or accepting that any shortcut left the host looking slightly off, usually because the mouth did not quite match the words. A series lives or dies on consistency, and the specific detail that kept breaking that consistency was lip sync.
This is a real constraint for any content built around a recurring presenter or character. The host is the brand, so every episode has to look right, and the thing viewers notice first when it does not is speech that does not match the mouth. Getting that consistently correct, episode after episode, is exactly where a series-based format gets expensive and fragile.
Why consistency is hard to sustain
A recurring host is only an asset if it looks the same and reads as believable every time. Filming that consistently means a person and a schedule that never slip; any generated shortcut that gets the lip sync wrong undercuts the identity the series depends on. So creators either lock themselves into an unsustainable production cadence or watch the host quality drift across episodes.
A consistent, synced host every episode
What makes a series-based format sustainable is a tool that produces the same host with the mouth matched to the script, every time. That is part of what Leadde.ai does: you can generate an avatar from a single photo or use a built-in presenter, lock in that host, and produce each episode from a script with the speech synced to the delivery. Because the host is generated rather than filmed, it looks the same in episode fifty as in episode one, and the lip sync is handled so each episode avoids the mismatch that usually signals a shortcut. A correction is editing text and regenerating, not reshooting, and support for a wide range of languages lets the same host front the series in more than one.
Where it fits for series and character-led content
The uses are concrete. A creator sustains a recurring on-screen host across a long series without an endless filming schedule. A brand keeps a consistent presenter across a content program. A channel produces the same host in more than one language while keeping the identity intact. In each case the format depends on consistency, and the tool supplies a host that stays believable episode after episode.
Where it falls short
Being straight matters, because this is a synthetic host. It reads as generated on close attention, so for content where a genuinely human, filmed presence is the whole appeal, film a real person. It suits clear, spoken delivery more than expressive or physical performance, where the limits show. And you should only build a host from an image you have the right to use, with a real person's likeness requiring their consent, and never use it to make someone appear to say something they did not agree to. A consistent synthetic host is a fine creative choice; impersonating a real person is not.
A small first test
Don't rebuild the whole series on it. Produce two or three episodes with a consistent generated host on a free tier, using a face you are entitled to use, and check whether the host holds up believably across them, lip sync included. If a consistent, synced host stays convincing episode to episode, it is worth using for the series, and your recurring format stops depending on a filming schedule that never slips.
In Closing of Disability Pride Month: What Disability Pride Means to Me
from Autism and Abuse: Finding Self-Acceptance
Until this month (July 2026), I was very hesitant to claim the term “disability pride”, as I don’t see autism or any other form of disability as something to be proud of. However, especially with the recent government attacks on disability access and programs, I can’t skimp on embracing whatever helps anymore.
I didn’t get diagnosed until nine and, before that, the only special ed help that I received was a program mostly for kids in broken homes in a retired principal’s house. But since that went only to the first grade, my mother homeschooled me for second, and the beginning of third, grade. However, just sitting doing a bunch of book- and paperwork lessons all day has never connected with my way of learning. That’s always been more my mother’s way of learning, and I think she assumed that just because I’m her daughter, I would automatically learn in the same way. She also couldn’t accept that I’m not the straight-A student that she was.
Special projects, art, and special demonstrations have always been more my way of learning. I can remember my mother doing exactly one project with me, and that was after I finished reading Laura Ingalls Wilder’s Little House on the Prairie. We made a replica of the house in Kansas out of a bunch of paper towel rolls with the roof and family out of cardboard cutouts—the latter, which my mother copied from illustrations in the book. My mother then insisted on putting all of the family cut-outs inside of the house replica and sealing it with the roof. She also wouldn’t cut out a door in it as she didn’t want me to reach back in to take them out.
I didn’t receive any special education at Shirley Elementary, my school in Arkansas. Since it was in a rural town, I’m not sure that Shirley even had much of a special education program. The only thing I remember closest to that was when *Mrs. Blanken, the counselor who tested me to make sure I was ready to be placed in a third-grade classroom. I believe that I was earning mostly C’s, so I wasn’t doing super badly. But, also considering the abuse that I was still enduring at home plus my parents’ separation and subsequent divorce, I never felt as if I really learned much from there. I also hadn’t been diagnosed just yet.
It wasn’t until after my grandparents got me diagnosed at nine that I was able to receive the learning center assistance in subjects that I was the weakest in: math and reading comprehension. I didn’t connect with either one at all back then. Today, my reading comprehension and critical thinking skills are no contest to what they used to be. Although if you were to make me do a reading comprehension assignment now, I would still have to look back at the text to make sure I’m getting all of the important information and that I’m remembering everything right.
I was also in speech therapy through my school for almost three years, which I found very helpful, at least in the short term. Unfortunately, though, it didn’t help with my stress stammering in the long run. Though I sometimes also stammer when I haven’t verbalized in a little while. I hate it when that happens, too! Though I’ve found that warming up my old choir voice to my car music really helps me keep that in check. I didn’t realize until very recently that music is also a sensory seeking thing for me.
However, the special education class that helped me the most was my Job Club class in high school. It prepared me for basic interview, and on-the-job etiquette, for considering the entirety of a job description before deciding whether to apply. And then, wearing our “uniform” of black pants and a white shirt, we would go out on mini unpaid internship-like fieldtrips to practice working. Usually with minimum-wage jobs like stocking, cleaning/busing tables, and helping out in food court restaurants. Though they “promoted” me to assisting a local elementary school art teacher when I told them that I was hoping to do that after college.
I believe that it’s partly thanks to my Job Club class that I’m the dedicated employee that I am today. That and I come from a family with a very strong work ethic.
It scares me that, without all of the special education assistance and therapies that I did have, I probably would’ve been thrown in an institution. It scares me that that could be the future for kids with disabilities again. That they will grow up being deprived of those rights, deprived of their sense of humanity, and deprived of their sense of individuality, not knowing the freedoms that my generation has been very fortunate to have. Which is what JFK and others, like Judith Heumann, worked so hard, even put their very lives on the line, to ensure wouldn’t happen again.
This is why disability advocacy is needed now more than ever. And why I consider myself to be one now.
Elegant Finger Mehndi Design Ideas for Every Celebration
from Dphulk
 Mehndi is an important part of many festivals and celebrations, and finger mehndi has become one of the most popular trends in recent years. Unlike full-hand mehndi, finger designs are simple, elegant, and easy to apply. They add a stylish touch without covering the entire hand, making them perfect for both traditional and modern looks.
Minimal floral patterns, leafy vines, geometric shapes, and Arabic-inspired designs are among the most loved styles. Whether you're attending a wedding, celebrating Eid, Karwa Chauth, Teej, or Diwali, finger mehndi designs complement every outfit beautifully.
Explore the Latest Finger Mehndi Design Collection
If you're searching for fresh and creative finger mehndi design ideas, you'll find a wide variety of elegant patterns that suit every occasion. From simple everyday styles to intricate festive designs, the collection includes high-quality images that inspire both beginners and experienced mehndi lovers.
The gallery features modern, Arabic, traditional, bridal, and minimalist finger mehndi styles, helping you choose the perfect design based on your personal preference.
Perfect for Festivals and Special Occasions
Finger mehndi is ideal for those who want a beautiful look without spending hours applying henna. These designs look amazing with rings, bracelets, bangles, and ethnic outfits, making them a popular choice for weddings and festive celebrations.
Many girls also choose finger mehndi for casual gatherings because it creates a fashionable appearance while remaining lightweight and elegant. Small floral motifs, dotted chains, and stylish finger bands can completely transform the look of your hands.
Easy, Stylish, and Trendy Designs
One of the biggest advantages of finger mehndi is its versatility. Whether you love traditional artwork or modern minimalist patterns, there is a design for everyone. These elegant patterns are also perfect for Instagram photos, Pinterest inspiration, WhatsApp status updates, and social media posts because they look clean, attractive, and highly aesthetic.
Beginners often prefer finger mehndi because it requires less time and fewer materials while still producing stunning results. Professional mehndi artists also use finger-focused designs to create unique combinations with wrist and palm patterns.
Why Finger Mehndi Design Is So Popular
Mehndi is an important part of many festivals and celebrations, and finger mehndi has become one of the most popular trends in recent years. Unlike full-hand mehndi, finger designs are simple, elegant, and easy to apply. They add a stylish touch without covering the entire hand, making them perfect for both traditional and modern looks.
Minimal floral patterns, leafy vines, geometric shapes, and Arabic-inspired designs are among the most loved styles. Whether you're attending a wedding, celebrating Eid, Karwa Chauth, Teej, or Diwali, finger mehndi designs complement every outfit beautifully.
Explore the Latest Finger Mehndi Design Collection
If you're searching for fresh and creative finger mehndi design ideas, you'll find a wide variety of elegant patterns that suit every occasion. From simple everyday styles to intricate festive designs, the collection includes high-quality images that inspire both beginners and experienced mehndi lovers.
The gallery features modern, Arabic, traditional, bridal, and minimalist finger mehndi styles, helping you choose the perfect design based on your personal preference.
Perfect for Festivals and Special Occasions
Finger mehndi is ideal for those who want a beautiful look without spending hours applying henna. These designs look amazing with rings, bracelets, bangles, and ethnic outfits, making them a popular choice for weddings and festive celebrations.
Many girls also choose finger mehndi for casual gatherings because it creates a fashionable appearance while remaining lightweight and elegant. Small floral motifs, dotted chains, and stylish finger bands can completely transform the look of your hands.
Easy, Stylish, and Trendy Designs
One of the biggest advantages of finger mehndi is its versatility. Whether you love traditional artwork or modern minimalist patterns, there is a design for everyone. These elegant patterns are also perfect for Instagram photos, Pinterest inspiration, WhatsApp status updates, and social media posts because they look clean, attractive, and highly aesthetic.
Beginners often prefer finger mehndi because it requires less time and fewer materials while still producing stunning results. Professional mehndi artists also use finger-focused designs to create unique combinations with wrist and palm patterns.
Day 51
from Out of Office
I can’t believe we are past 50 days of not working. It has gone way longer than I thought it would. I have decided today to stop checking every day. Instead, I will just wait for the email when there is an update. They always send an email, so instead of logging in anxiously every day, I will just wait.
I also got the seed of a somewhat crazy, somewhat ambitious life change that I may look more closely at in the coming months. It is something I considered a few years ago but ended up not pursuing due to the start of my last relationship. Seeing how things turned out, I wish I had ended that relationship sooner and started my quest back then instead. Now I am starting to have the same inkling and I would rather not look back in five years and wish what I wish I had done five years ago. I need to do very thorough research and be very patient, and brave.
I won’t get into the weeds of it because the truth is I don’t know if I have the guts to jump that far. I will sleep on it for a couple of months, or maybe when my situation gets a positive update. Just like everything else, for now we wait.
Thank you for your message. I am currently out of office with no set return date. I will get back to you when the time is right.
Sunset Street Food
from  { la.cphotoj.com }
Street stalls + food trucks on Sunset Blvd between Figueroa & Beaudry…


Multiple days, things move around, some are closed on certain days.
What I read in July 2026
from Noisy Deadlines
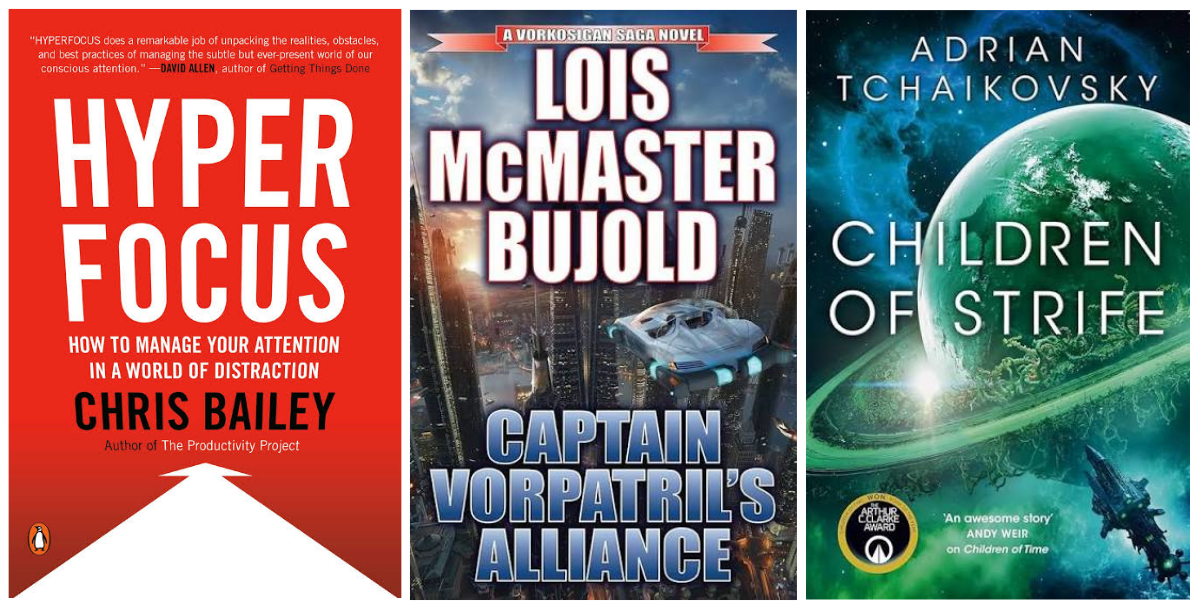
Hyperfocus: The New Science of Attention, Productivity, and Creativity by Chris Bailey, 256p: Great read about focus with enough scientific data and practical insights. The author talks about “attentional space”, which is like our RAM or the available working memory capacity. He argues that because the amount of distraction machines we have available at our fingertips right now, our attentional space shrinks and our minds wander less, reducing the quality of our attention. The author explores “hyperfocus”, which is deep, intense focus on an activity, versus “scatterfocus” which is mind wandering. Both of these modes are important and there are nice diagrams to help understand the concepts.
Captain Vorpatril's Alliance (Vorkosigan Saga (Publication Order)) #15 by Lois McMaster Bujold, 580p: This time a fun adventure with Miles' cousin: Ivan Vorpatril. It's the Ivan book! It is packed with action and Ivan getting caught in hilarious situations. Miles and Ekaterin make some appearances, but we also see Simon, Alys, Gregor and even Cordelia in some scenes. There is mystery, a fake marriage situation, family secrets and failed engineering with sinking consequences. Tej's family had an interesting mafia vibe without malice, just pure family loyalty and eccentric choices. Overall a funny and lighthearted book, which matches Ivan's eternal optimism.
Children of Strife (Children of Time #4) by Adrian Tchaikovsky, 496p: I didn't find this book as enjoyable as the previous ones in the series. The pacing was off, with these three different timelines alternating. Some chapters felt repetitive, telling the same story already covered in previous books. The First Age chapters with the human terraformers was by far my least favorite timeline. The Second Age with the ark ship was so-so. The only timeline I was invested in was the Third Age with the excellent mantis-shrimp hero called Cato. I missed seeing the octopuses and the corvids.